The network of transistors, capacitors, and connecting wires that power your household appliances is an electric circuit. These circuits can be simple or complex, based on the specific requirements of the spaces they serve.
The first step in any electrical installation is to prepare the wires for a new circuit. This is done by installing cable connectors. Then, you make the connection to the breaker in the panel. Visit https://www.ampi-electricinc.com/west-palm-beach-electrician/ to learn more.
The electrical wiring system powers the appliances, lights, and devices that enable a comfortable lifestyle. Its components range from hidden wiring inside walls to the visible switches and outlets that facilitate everyday activities. The design of an electrical installation depends on the specific needs of each building. Having good communication and working hand-in-hand with architectural, mechanical, and structural engineers can help avoid errors and costly changes later on.
For a residential project, the electrical design begins with determining the final electric circuits required. The basic electrical wiring of a single-family home typically includes two final electric circuits for lighting and socket-outlets. In addition, there is usually a third electric circuit to power the electrical stove. These circuits are connected to the floor distribution board.
Proper cable route planning is crucial to a safe and efficient electrical installation. This includes minimizing wire lengths to reduce voltage drop. It is also important to separate data cables from power wires to avoid electromagnetic interference, which can cause sensitive equipment to malfunction. Additionally, it is recommended to include additional circuits and outlets in anticipation of future equipment needs and future wiring upgrades.
During the design development (DD) phase, the architectural drawings for the facility are reviewed to determine the location of all electrical equipment and to ensure the layout meets all requirements set forth by the NEC and local codes. This is the time to coordinate the location of generators, utility switchgear, and utility-furnished transformers, if applicable. Dedicated space is a zone that extends 6 ft above the equipment and is reserved to support conduit/other raceways supporting incoming and outgoing circuits. This provides access for maintenance and protects the electrical equipment from systems foreign to it.
Conduits and Fittings
Conduits are the protective pipes that house electrical wiring in a building. They are designed to prevent fires by providing a pathway for the wires to travel through, while also keeping them away from potential hazards such as heat and water. Conduits come in a variety of shapes and sizes to suit specific environments. They can be rigid or flexible, and they may offer varying degrees of protection against impact, corrosion, gases and vapors, moisture, and fire.
Different types of conduit fittings are available, including couplings, elbows, and connectors. These conduit fittings are mainly used in electrical projects to connect one piece of conduit to another. Different conduit fittings are used depending on the type of electrical project and the environment in which it is installed. For example, a nonmetallic tubing used in a basement may use different fittings than a metallic pipe used in a factory.
When choosing a conduit system, consider the size and capacity needed to accommodate current and future cables. Also, remember to factor in the environmental conditions where the conduit will be installed, as this will influence the allowable amperage ratings. Additionally, make sure to label and document the cable routing for easy maintenance and troubleshooting.
Surface conduit wiring involves putting the wires through holes in the walls or ceiling. This type of electrical wiring is comparatively cheaper and doesn’t take up the entire space of a conduit. However, the downside is that it requires a large amount of accessories like conduit fittings to install them properly. It is essential to follow industry standards when installing surface conduits to ensure a smooth and safe installation. It’s also important to remember that an earth wire of the appropriate size should be run along with these conduits.
Boxes
Electrical boxes serve more than one purpose; they protect wiring from being damaged, loosened, or pulled apart, which could cut off power to a circuit, cause a fire, or both. Usually, there are several holes in the bottom of the box for mounting to a stud, and there is a cover that can be screwed or nailed into place. The types of boxes used in electrical installations vary according to the type and function of wiring that will be installed.
The most common types of electrical boxes are junction boxes that can be found in walls and ceilings to house lighting fixtures, switches, receptacles and other electrical devices. These are usually round or octagonal in shape and can accommodate a lot of wiring. They can also have punch-out holes for inserting conduit.
When working with plastic electrical boxes, use light blows with the hammer when nailing them to a stud; they can be fragile and may break if you hit them too hard. Using metal box brackets instead will help protect the boxes and allow you to drive strong nails that provide plenty of holding strength. Plastic electrical boxes are more affordable than metal ones, but they can melt or bend when stressed. They are ideal for low-stress applications such as in a basement or unfinished mudroom where the box won’t be enclosed in drywall. Metal electrical boxes are required when metal-sheathed (NM or Romex) cables or conduit run in or out of the box, as these wires depend on bonding with the metal of the electrical box for grounding. They are also recommended for wet or high-temperature environments. They are available in different sizes and made of either aluminum or fiberglass.
Wiring
Electrical installations use a network of wires to provide electricity in homes, businesses and other buildings. This infrastructure is the essential framework that empowers us to command lights and ensures the reliable operation of appliances. It’s a complex network that spans concealed wiring within walls to the visible outlets, switches and fixtures we depend on every day.
Wires have specific specifications that determine how much current they can safely carry based on their circuit voltage, conductor surface temperature rating and environmental conditions (moisture, oil, sunlight). Each type of wire or cable is also colour-coded to indicate its purpose or application. It’s important to select the right wire for each job and follow the rules of harmonisation, as this helps avoid dangerous errors.
The process of connecting and testing an electrical installation involves multiple stages, starting with fitting conduits and running wires, ending with installing outlets, switches and fixtures. Electrical systems need regular inspections and maintenance to function properly, and telltale signs, such as tripping breakers or flickering lights, are an indication of faulty wiring that needs upgrading.
In a typical household, the electrical installation consists of a main power panel that transfers linear electricity to circuit wires that power lightbulbs, appliances and other receptacles. Then, a common wire returns the electricity to the main panel. Depending on the layout of a house, there may be subpanels that transfer power to separate locations.
When it comes to commercial or industrial installations, the complexity and size of an electrical system can vary widely. However, the core principles remain the same – providing a safe and reliable power supply for machinery, tools and other equipment.
Termination
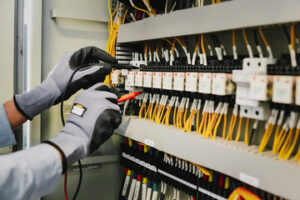
Before terminating any electrical wires, it’s essential to take the proper precautions to ensure your safety. This includes turning off the power to the circuit in which you’ll be working and clearing your workspace to eliminate any potential hazards. You should also use insulated gloves, a non-conductive work surface, and appropriate tools to minimize the risk of injury or damage. In addition, make sure to label the ends of your wires and test each termination before continuing.
The next step is to carefully cut and strip the wire. This can be done using a variety of different tools, depending on the type of cable you’re working with. For example, for UTP cables, a ringing tool or electrician’s snips will allow you to remove the sheath without damaging the wiring underneath. Once the wires have been stripped, they should be properly terminated using crimping, soldering, or compression fittings. Proper termination can help maintain proper insulation, grounding, and strain relief, which is important for ensuring the safety of the system and its components.
Gland accessories, such as locknuts, sealing washers, earth tags, and shrouds, are also available for cable glands to provide additional protection and functionality. It’s important to choose a gland and accessories that meet your specific project requirements, such as cable size, conductor material, environmental conditions, and ingress protection. You can consult with industry experts or refer to standards to make an informed decision. Once the termination is complete, it’s essential to restore power and thoroughly inspect your work. If you have any concerns or questions about your completed termination, it’s a good idea to contact a professional technician for further evaluation and assistance.